DIY Decorative Hanging Light

We have currently been redecorating Skylar's room (a room tour isn't too far away). One of our favorite projects was decorating her hanging light. All we used to make this cute, hanging light was:

  • Hanging Light (we got this one at Lowe's)
  • Lampshade (from Target)
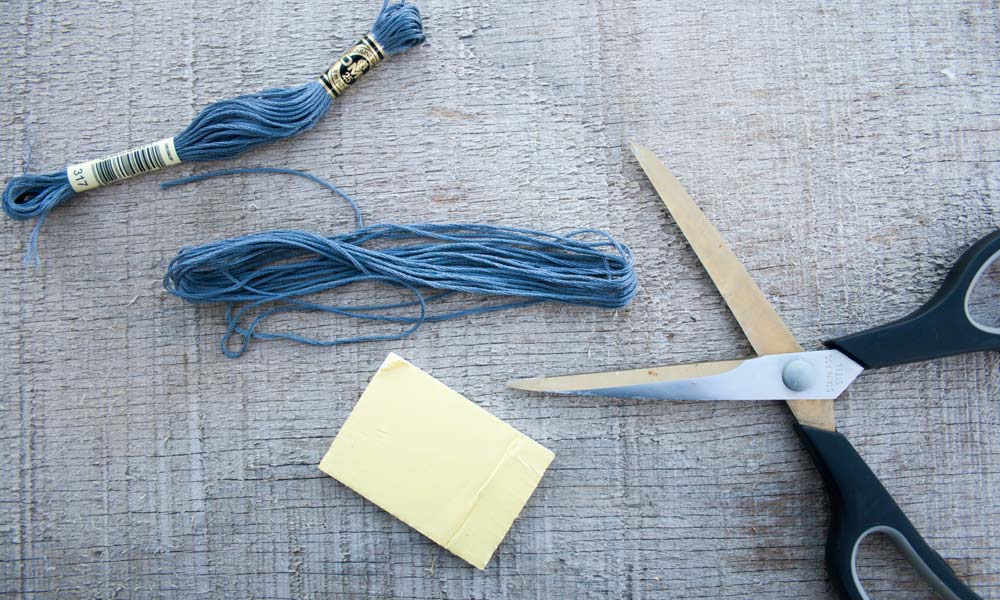
  • Tassels (learn how to make them on yesterday's blog post)
  • Decorative ceiling medallion (you can get them at the hardware store)
  • Spray paint
  • Hot glue gun

First, we spray painted the ceiling medallion to match the rest of the room. We used double sided tape to hold the medallion while we screwed the light fixture into place. This held the medallion tightly in place so that Jake could wire the light.

My Only Sunshine || DIY Decorative Hanging Light

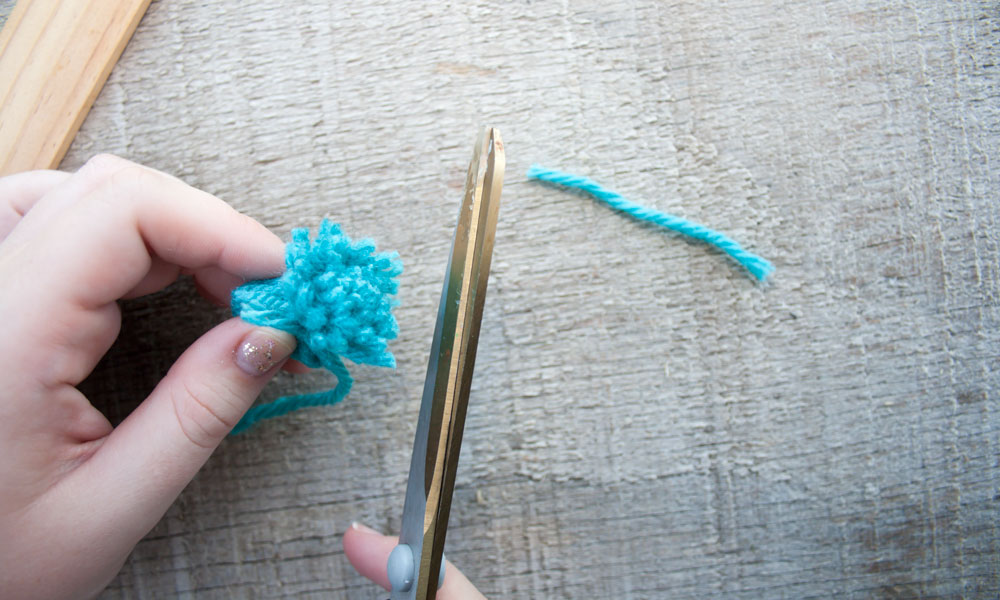
Next, we made our tassels. Make however many you think will fit and look good on the shade, we chose six tassels. We then divided the circumference of the bottom of the shade into six sections and hot-glued the tassels at each section. You can add more or less depending on the size of the shade or the look you are wanting. And that's it! It's a simple project that adds a special touch to the room.

My Only Sunshine || DIY Decorative Hanging Light

As always, we would love to see anyone's version of our diy project! And always remember to tag us at Instagram, Twitter, and Facebook!

Britt & Sky

DIY Tassels

We started making these cute tassels recently. They are quick and easy to make and can be added to a lot of projects to make them fun! All you need to get started is:

  • Embroidery floss
  • Scissors
  • Small piece of wood (The length of the wood will determine the size of your tassel)
My Only Sunshine || DIY Tassels

1. Wrap your floss around the wood eight times. (Or more depending on how thick you want your tassel)

My Only Sunshine || DIY Tassels

2. Take another piece of floss and string it through the rest of your floss. Pull both ends up at the top and tie a knot.

My Only Sunshine || DIY Tassels

3. Take a third piece of floss and tie a knot in your bundle of floss about a centimeter down.

My Only Sunshine || DIY Tassels

4. Cut off the extra from the knot you just tied.

My Only Sunshine || DIY Tassels

5. Next, cut the bottom of your bundled floss off. Cut it at whatever length you choose, but make sure to do all of your tassels the same length.

My Only Sunshine || DIY Tassels

THATS IT! You're finished and now have a cute, little tassel! Just repeat the steps for however many you need.

Soon we will be sharing with you what we used our tassels for. Until then, we would love to see new projects these tassels can be used on. Upload and tag us in your pictures on Instagram, Twitter, or Facebook!

Britt & Sky

DIY Pom Poms

Little pom poms can add so much personality to whatever you want to add them to. Plus they are so simple to make. Here's what you need:

  • yarn
  • scissors
  • A flat object that has a width of the size of pom pom you want to make. We used a paint stick because we wanted our pom poms to be relatively small.
  • A partner (optional; we just found that its a little easier to have someone tie your yarn for you on certain parts)
My Only Sunshine || DIY Pom Poms

1. You will need one large piece of yarn and then a smaller piece to tie with. If you aren't sure how big you want your pom pom to be, don't cut your large piece of string, just pull it from your ball of yarn.

My Only Sunshine || DIY Pom Poms

2. Wrap the yarn around your object. We wrapped ours around the paint stick 25 times.

My Only Sunshine || DIY Pom Poms

3. Next, carefully remove the wrapped yarn from the object and lay it on your small piece you already cut. Make sure that the piece is in the center.

My Only Sunshine || DIY Pom Poms

4. Here is where a partner comes in handy. Double knot the small piece of yarn. Make sure you get it really tight or your pom pom will fall apart.

My Only Sunshine || DIY Pom Poms

5. Cut all of the loops on one side.

My Only Sunshine || DIY Pom Poms

6. Do the same to the other side.

My Only Sunshine || DIY Pom Poms

Ta-da! You have an adorable little pom pom!


We have a really fun project that we will be using these for soon. Do you have anything that you could add them to? Tell us here in the comments section or show us on instagram, facebook, or twitter!

Happy Tuesday!!

Britt & Sky

City Market Adventures

Every weekend we try to go to the city market to get some fresh fruits and veggies. The city market is always a fun place to spend a weekend morning at. Not only do they have the yummy, fresh food they also have many cool restaurants, fun people and vendors, talented street performers, and an all around great atmosphere. When we go we always enjoy getting delicious bengeits, iced coffee, smoothies, and fresh flowers. We also get a lot of yummy fruits and veggies for a great price! Today we have some pictures of Sunday's fun little adventure at the city market.

Here are our favorite shops at the city market:

My Only Sunshine || KC City Market Adventures

And this is what Noah does ...

My Only Sunshine || KC City Market Adventures

Hope you had a great weekend!

Britt & Sky

Yes ... We Celebrate Half-Birthdays

It's hard to believe that six months ago, I was going in to the hospital seven and a half weeks before my due date and was told by my doctor that I would have to deliver Noah that same afternoon. It was the scariest but best thing I have ever gone through. And this last six months have been the hardest, most emotional, tiring, and fulfilling months of my entire life. Its so crazy how you can be the most selfish person and then you see your baby and you would do anything in the world for them.

Anyway ... I digress. So yesterday was Noah's half-birthday. Which is a big deal! You only understand if you have kept a mini-human alive for that long :) Its a big deal people. So we decided to have a mini "party." Noah got a new outfit of course. And he got these super awesome mini party hats from the Oh Joy for Target collection. I also had to get the happy banner. (Find all of the Oh Joy for Target products here)

For Noah's special surprise, I made him a sweet potato and apple baby food. Which when you're celebrating your first six months, is served in a fancy Oh Joy goblet. :) (I will post the recipe at a later date.)

The most important part of our celebration are these adorable photos that I got. Feast your eyes ...

My Only Sunshine || Noah's Half-Birthday Celebration #ohjoyfortarget #ohjoy

Happy Wednesday!

Britt